


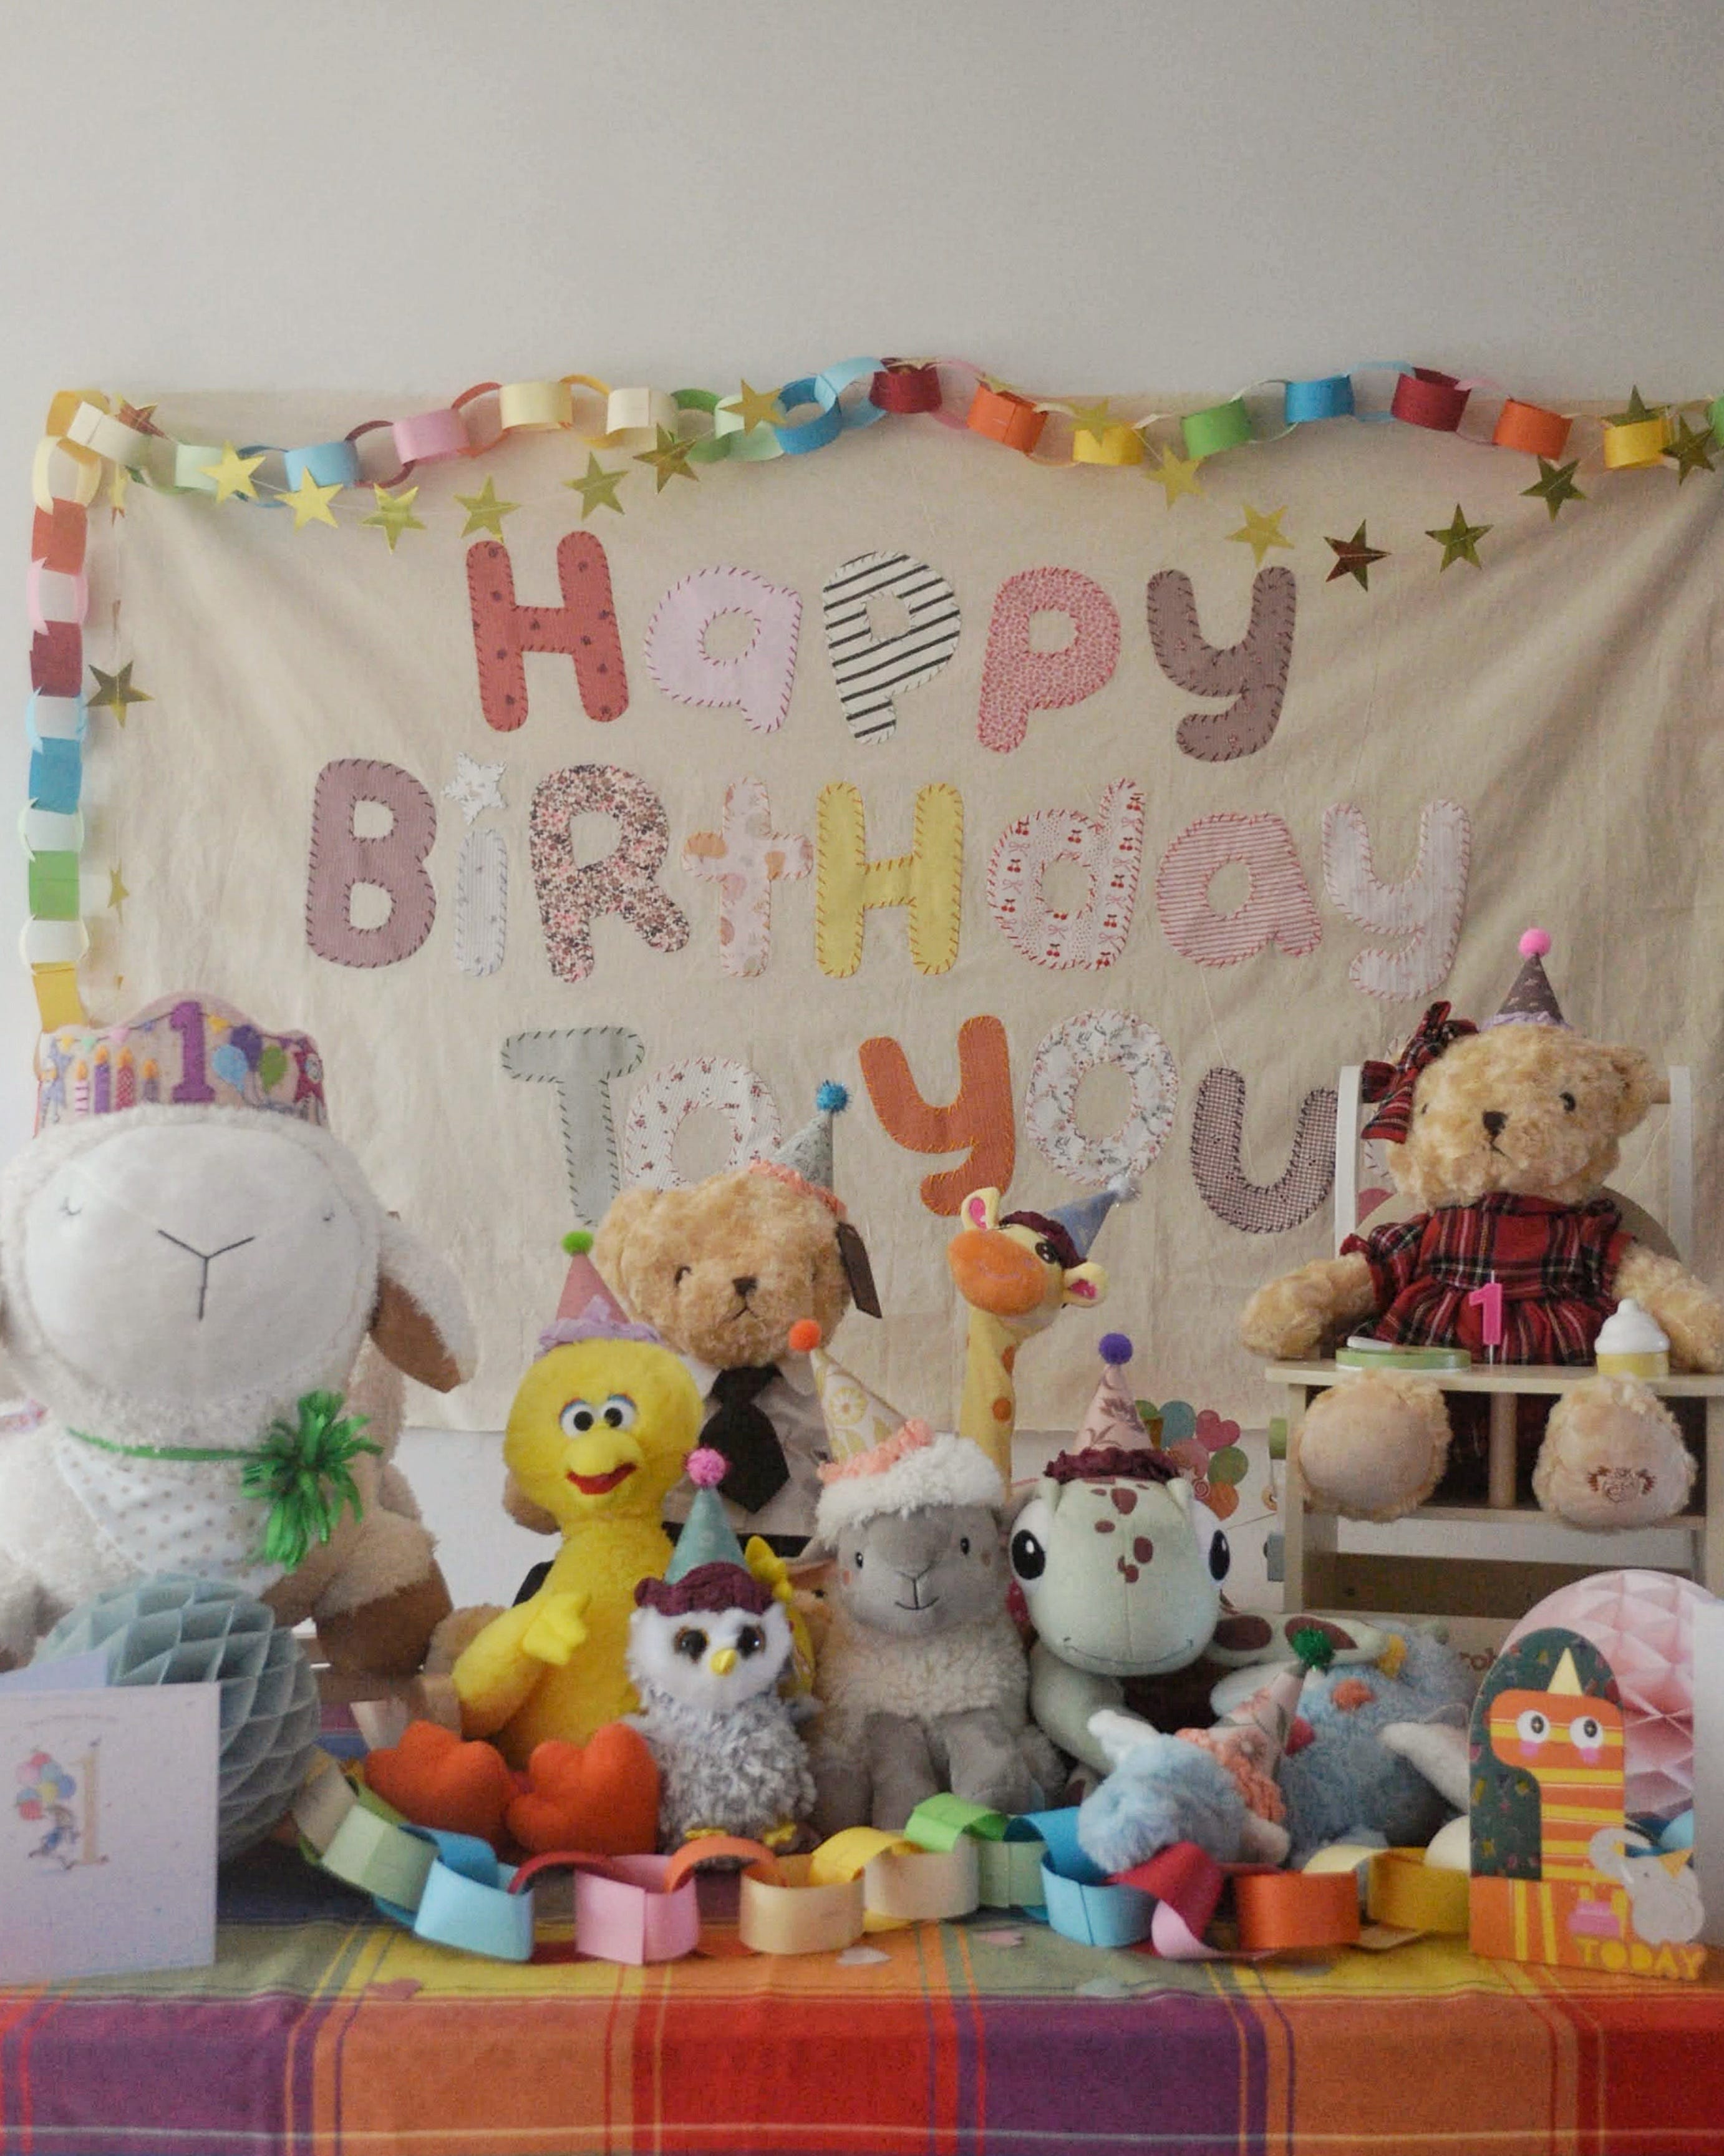
Hi friends, happy weekend! I hope this post finds you well-rested, appropriately caffeinated, and with some fun plans for the day ahead; be it a cosy day on the couch watching films, getting out for a walk, or meeting a friend for coffee. As promised, I’m dropping into your inboxes to share a very fun post with you: every single detail from Bean’s “it’s fun to be ONE!” birthday party! I went a little craft crazy in the run up to the party, and I’ve been dying to share an in-depth look at everything I made! Who knew having a baby would awaken the crafty woman within me?!
Before we get into it, you might’ve read in my last MM post that we, unfortunately, ended up missing the birthday party. There’s more details in the MM post, but long story short: Bean’s temperature went through the roof and we had to leave the party about 10-minutes after it started to rush her to the emergency room. It ended up being a weird viral thing and thankfully we got home later the same night — but I’m only mentioning it because it means I didn’t get to take any photos of the soiree in motion. Every photo included below was taken either before or after the fact, but I think you’ll get a pretty good feel for the crafts anyways.
Full disclosure: this is a loooooong post! When I said I’ve included every single detail from the party, I meant every! single! detail! I hope you love it, I hope you find it helpful, and, if you’re in the depths of party planning, I hope it provides you with some fun inspiration 😊

everything i DIY-ed
adorable invite
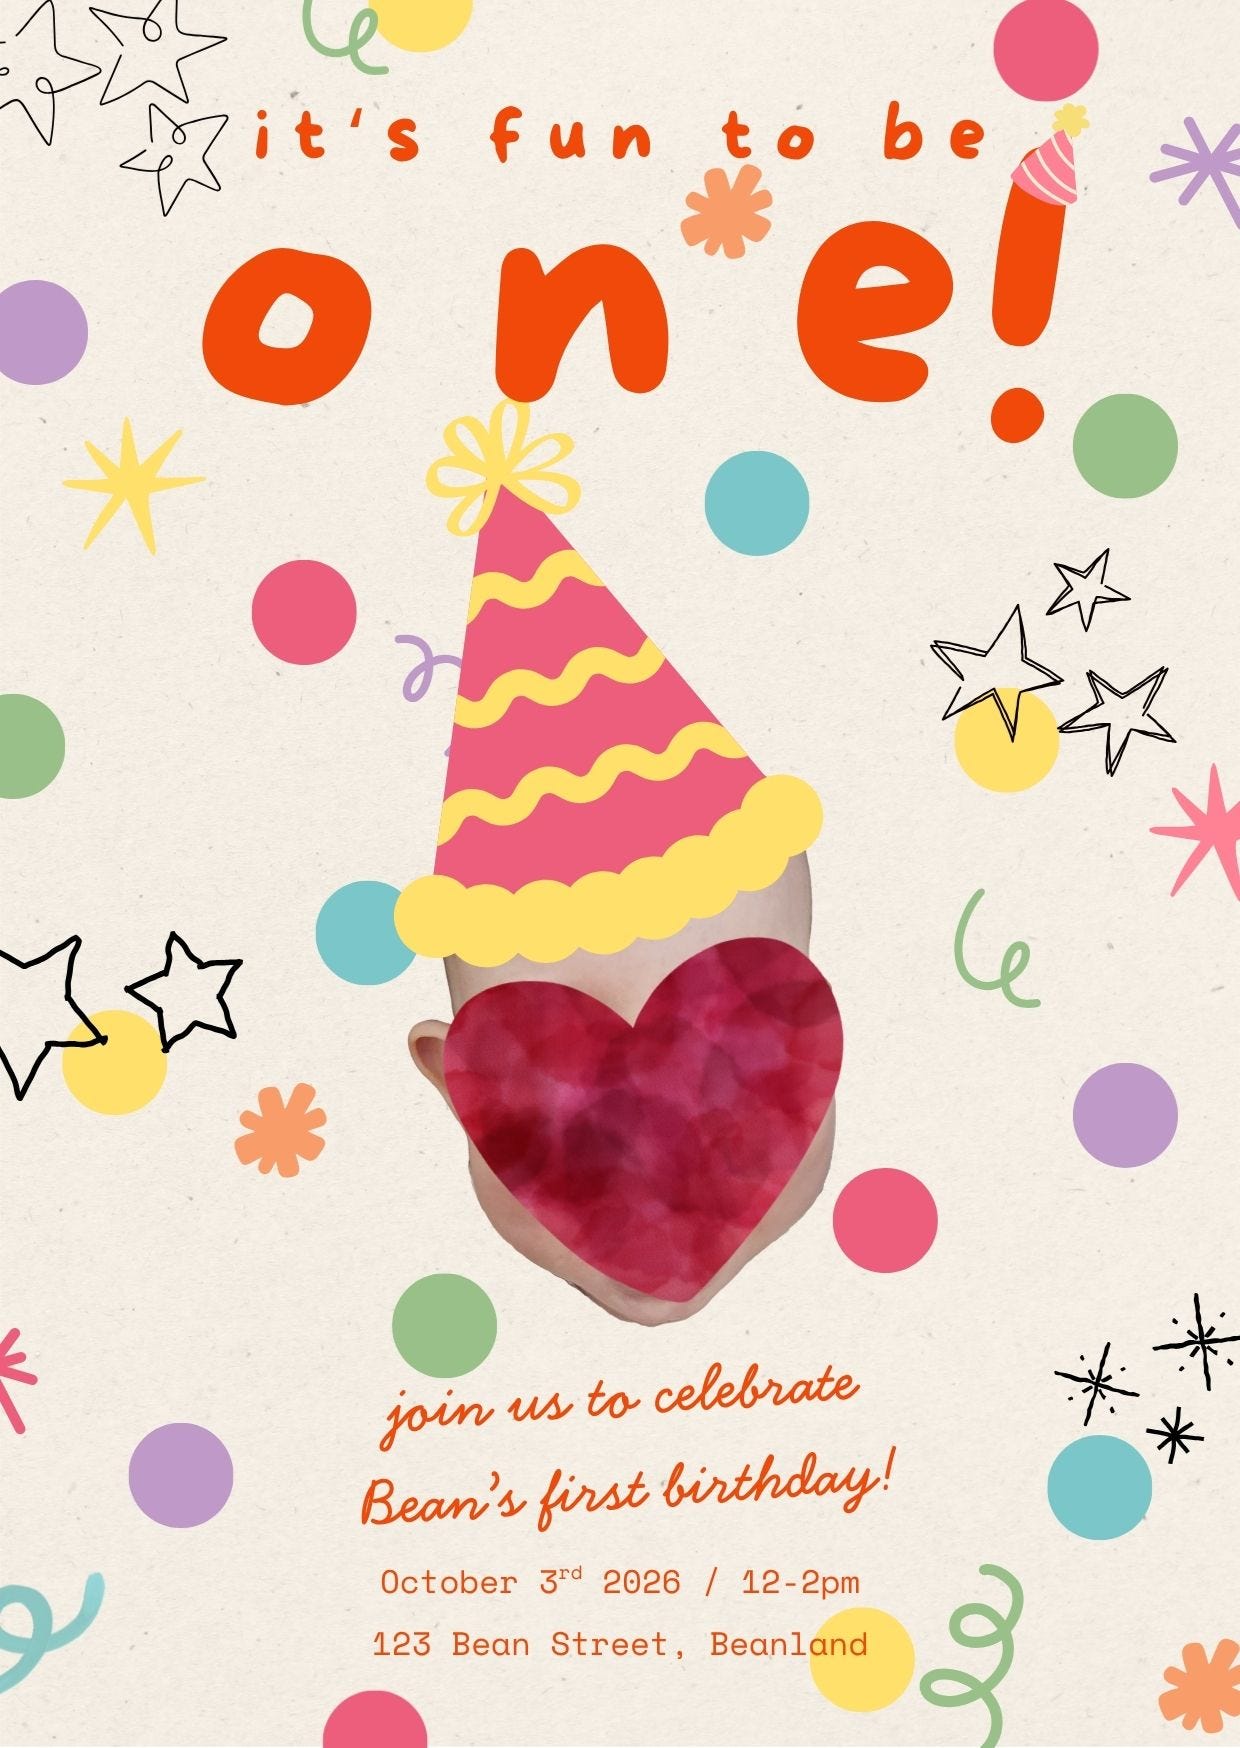
Okay, this was by far the easiest thing I made for the party, but I love how it came out!! I wanted the invitations to be super fun and colourful, while also hinting slightly at the major cuteness of the birthday face garland I planned to surprise everyone with.
I kept mostly to a lavender / pale blue / sage green / dusty pink / sunny yellow colour scheme, and finished the whole thing off with a few mismatching squiggles and hand-drawn stars. I had initially littered the background with a dousing of semi-transparent sprinkles, but ended up removing them because the extra colour was too distracting.
Isn’t this just the cutest invite you’ve ever seen? I wish I could show you the version with Bean’s big cheesy grin!
DETAILS:
// PicWish, to remove the background of a photo and get a cut-out of Bean’s face
// Canva, for designing the invite. Fonts used: More Sugar, Handsome, Space Mono
happy birthday plate


This is maybe the only craft on my list that I wasn’t sure about — I thought it might’ve been a little TOO extra? — but I’m so glad I decided to go ahead and own my extra-ness because it came out so! cute! My mom and I went to a local pottery painting place, booked a seat for 2-hours, and found our inner zen as we lost ourselves in the process. I looked at roughly a gazillion different designs online before going to the pottery studio, so I had a pretty clear idea in my head of what I wanted to do: bunch of balloons, sprinkle background, scalloped edge, and retro typeface-style lettering. Again, I kept to the same colours as above, and I love how fun it came out!
I also am just so proud that I painted this and we’ll get to pull it out year after year to eat cake off of?! So cool!
DETAILS:
// The Art Lab, for pottery painting
birthday face garland


It’s hard to choose for sure, but this DIY is maybe my favourite of the bunch? I saw the idea online and knew immediately that I’d have to make one for Bean’s birthday, because how could I not?! I ordered a bunch of zoomed-in photos of Bean making a variety of faces — the funnier the better! I went for as many different ones as I could find — , cut them out, glued little triangle party hats into place, topped each hat with a pom pom, and glued them all onto a long ribbon to string across the room. Of course, because I’m a crazy lady, I also decorated each of the hats with different ribbons and designs, so no two hats were the same.
Judge my OTT-ness all you want, but it was so worth the effort! This is hands-down the most adorable thing I’ve ever made, and the fact that every single face AND every single hat is different makes it so much more interesting to look at — like a mini art piece! It is also the most joyous thing I have ever laid my eyes on, and if you leave this post with just one birthday DIY to take home, please let it be this; it is so fun!!
DETAILS:
// Snapfish, for 50 free prints a month on the app
// coloured card from Tesco, for cutting into party hats
// mix of regular + glitter pom poms from Euro Saver + Dealz, for topping the hats
// assorted ribbon / tissue paper / bows, etc., for decorating the hats
// 9m long ribbon from Søstrene Grene, for hanging the finished garland
// hot glue gun, for assembling
mini party hats for her favourite teddies
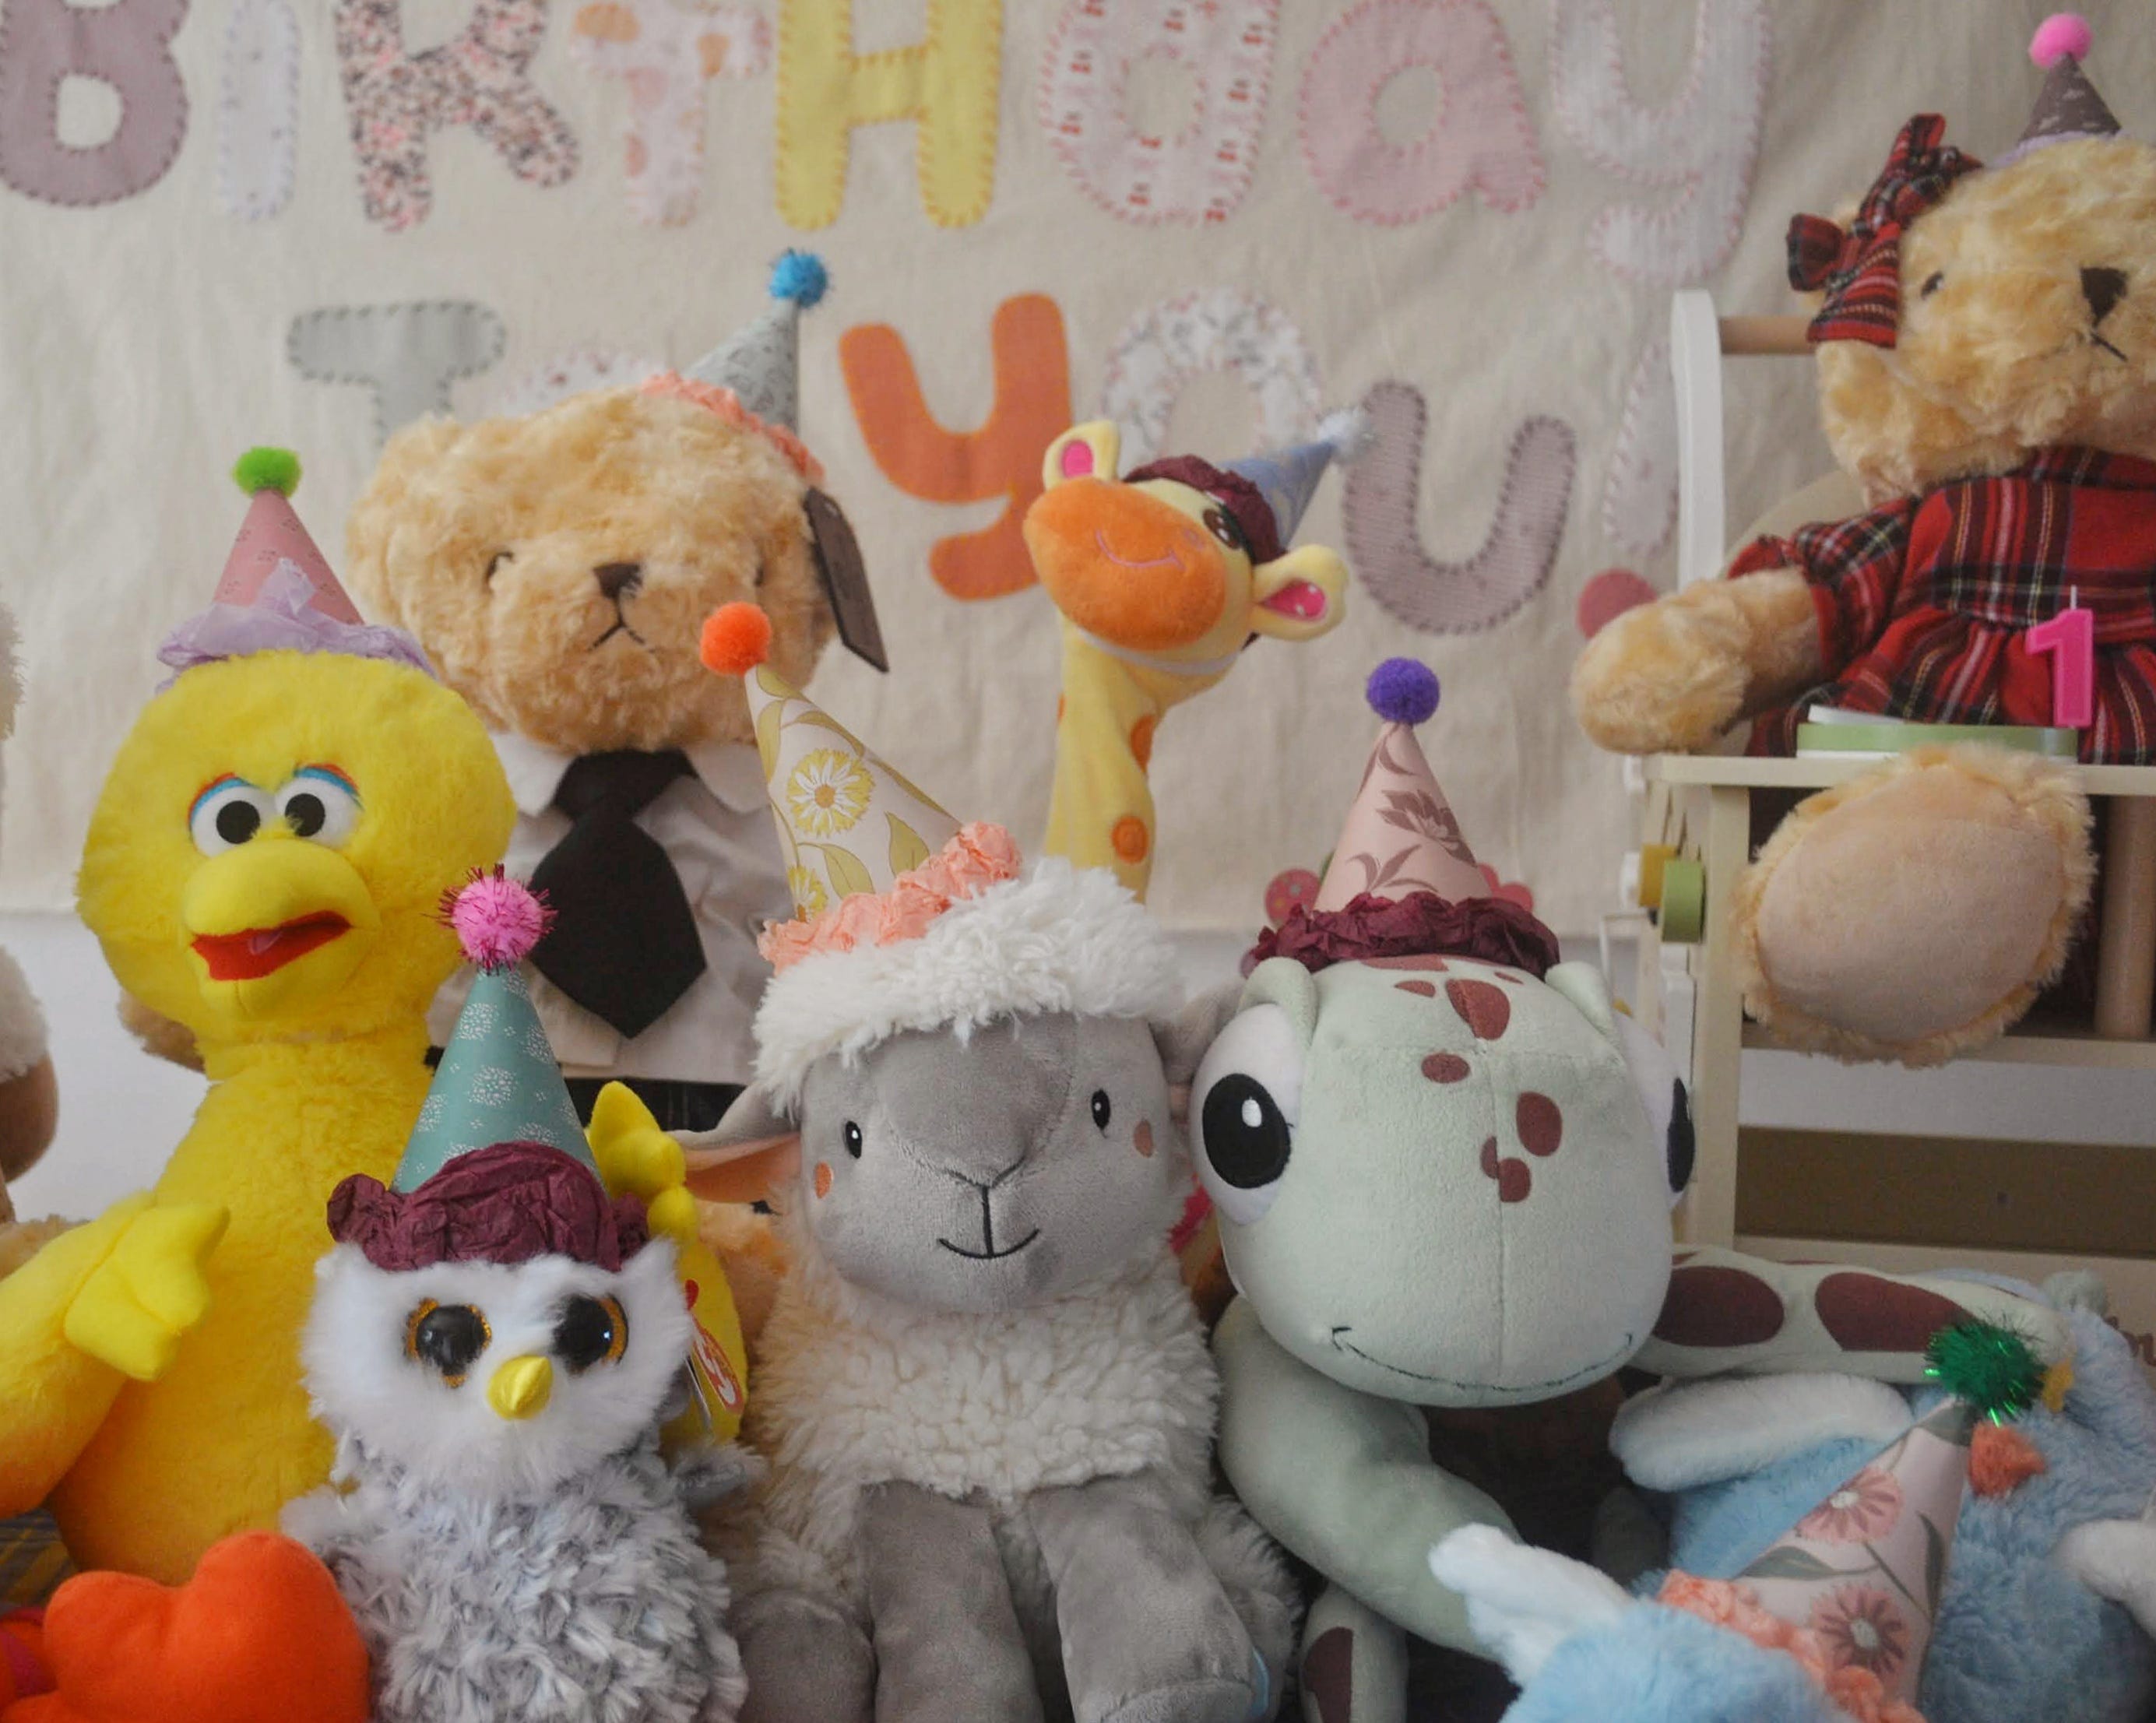
I think I was in denial about the fact that I was going to make these until I was actually making these; I included it on my bizarre birthday prep list, but it seemed too ridiculous to say out loud to even Husband. One afternoon, just to see if it was easy / worth it, I casually cut out a semi-circle, rolled it up, hot-glued it into place, and the end result was so cutesy that before I knew it I was measuring the heads of Bean’s most beloved teddies for their custom party hats. Naturally, I had to dress them up ever-so-slightly by adding a fun layer of design paper, a pom pom, and a ruffled tissue paper trim. Aren’t they just the cutest little hats you’ve ever seen?
We dotted the decked out teddies around the party zone for an added little splash of fun ✨
DETAILS:
// coloured card from Tesco, for base sturdiness
// design paper from Søstrene Grene, for the decorative outer layer
// mix of regular + glitter pom poms from Euro Saver + Dealz, for topping the hats
// elastic cord from Dealz, for securing into position
// different coloured tissue paper, for a decorative base edge
// hot glue gun, for assembling
felt birthday crown


I have been mentally preparing for this moment ever since I made Bean a felt crown for her 1/2 birthday back in April, and when I actually sat down to sketch out an idea of what I wanted to make, it just flowed right out! Keeping in line with the rest of the DIYs, I thought it would be cute to do a simple party themed crown: balloons, candles, bunting, and two dancing stars that reminded me so much of Weird Barbie when I was sewing them into existence. I also decided to stitch some sparkles into the background for a little extra pizzazz, and I L-O-V-E the finished product!!
Of course, I used the word simple above, but it probably took me 3- to 4-days of solid work during Bean’s naps to make the crown from beginning to end. The process 100% would’ve been quicker if I went with a less colourful or less intricate design filled with many tiny little pieces — but where would the sense of accomplishment be in that?! I regret nothing and the end result was worth every single second!
DETAILS:
// Hey Jen Brannen, for crown templates, sewing tutorials, and endless inspiration
// different coloured felt, for the crown and any embellishments
// embroidery thread + needles, for sewing the details onto the crown
// lilac heart + flower ribbon from Søstrene Grene, for tying the crown closed
happy birthday backdrop
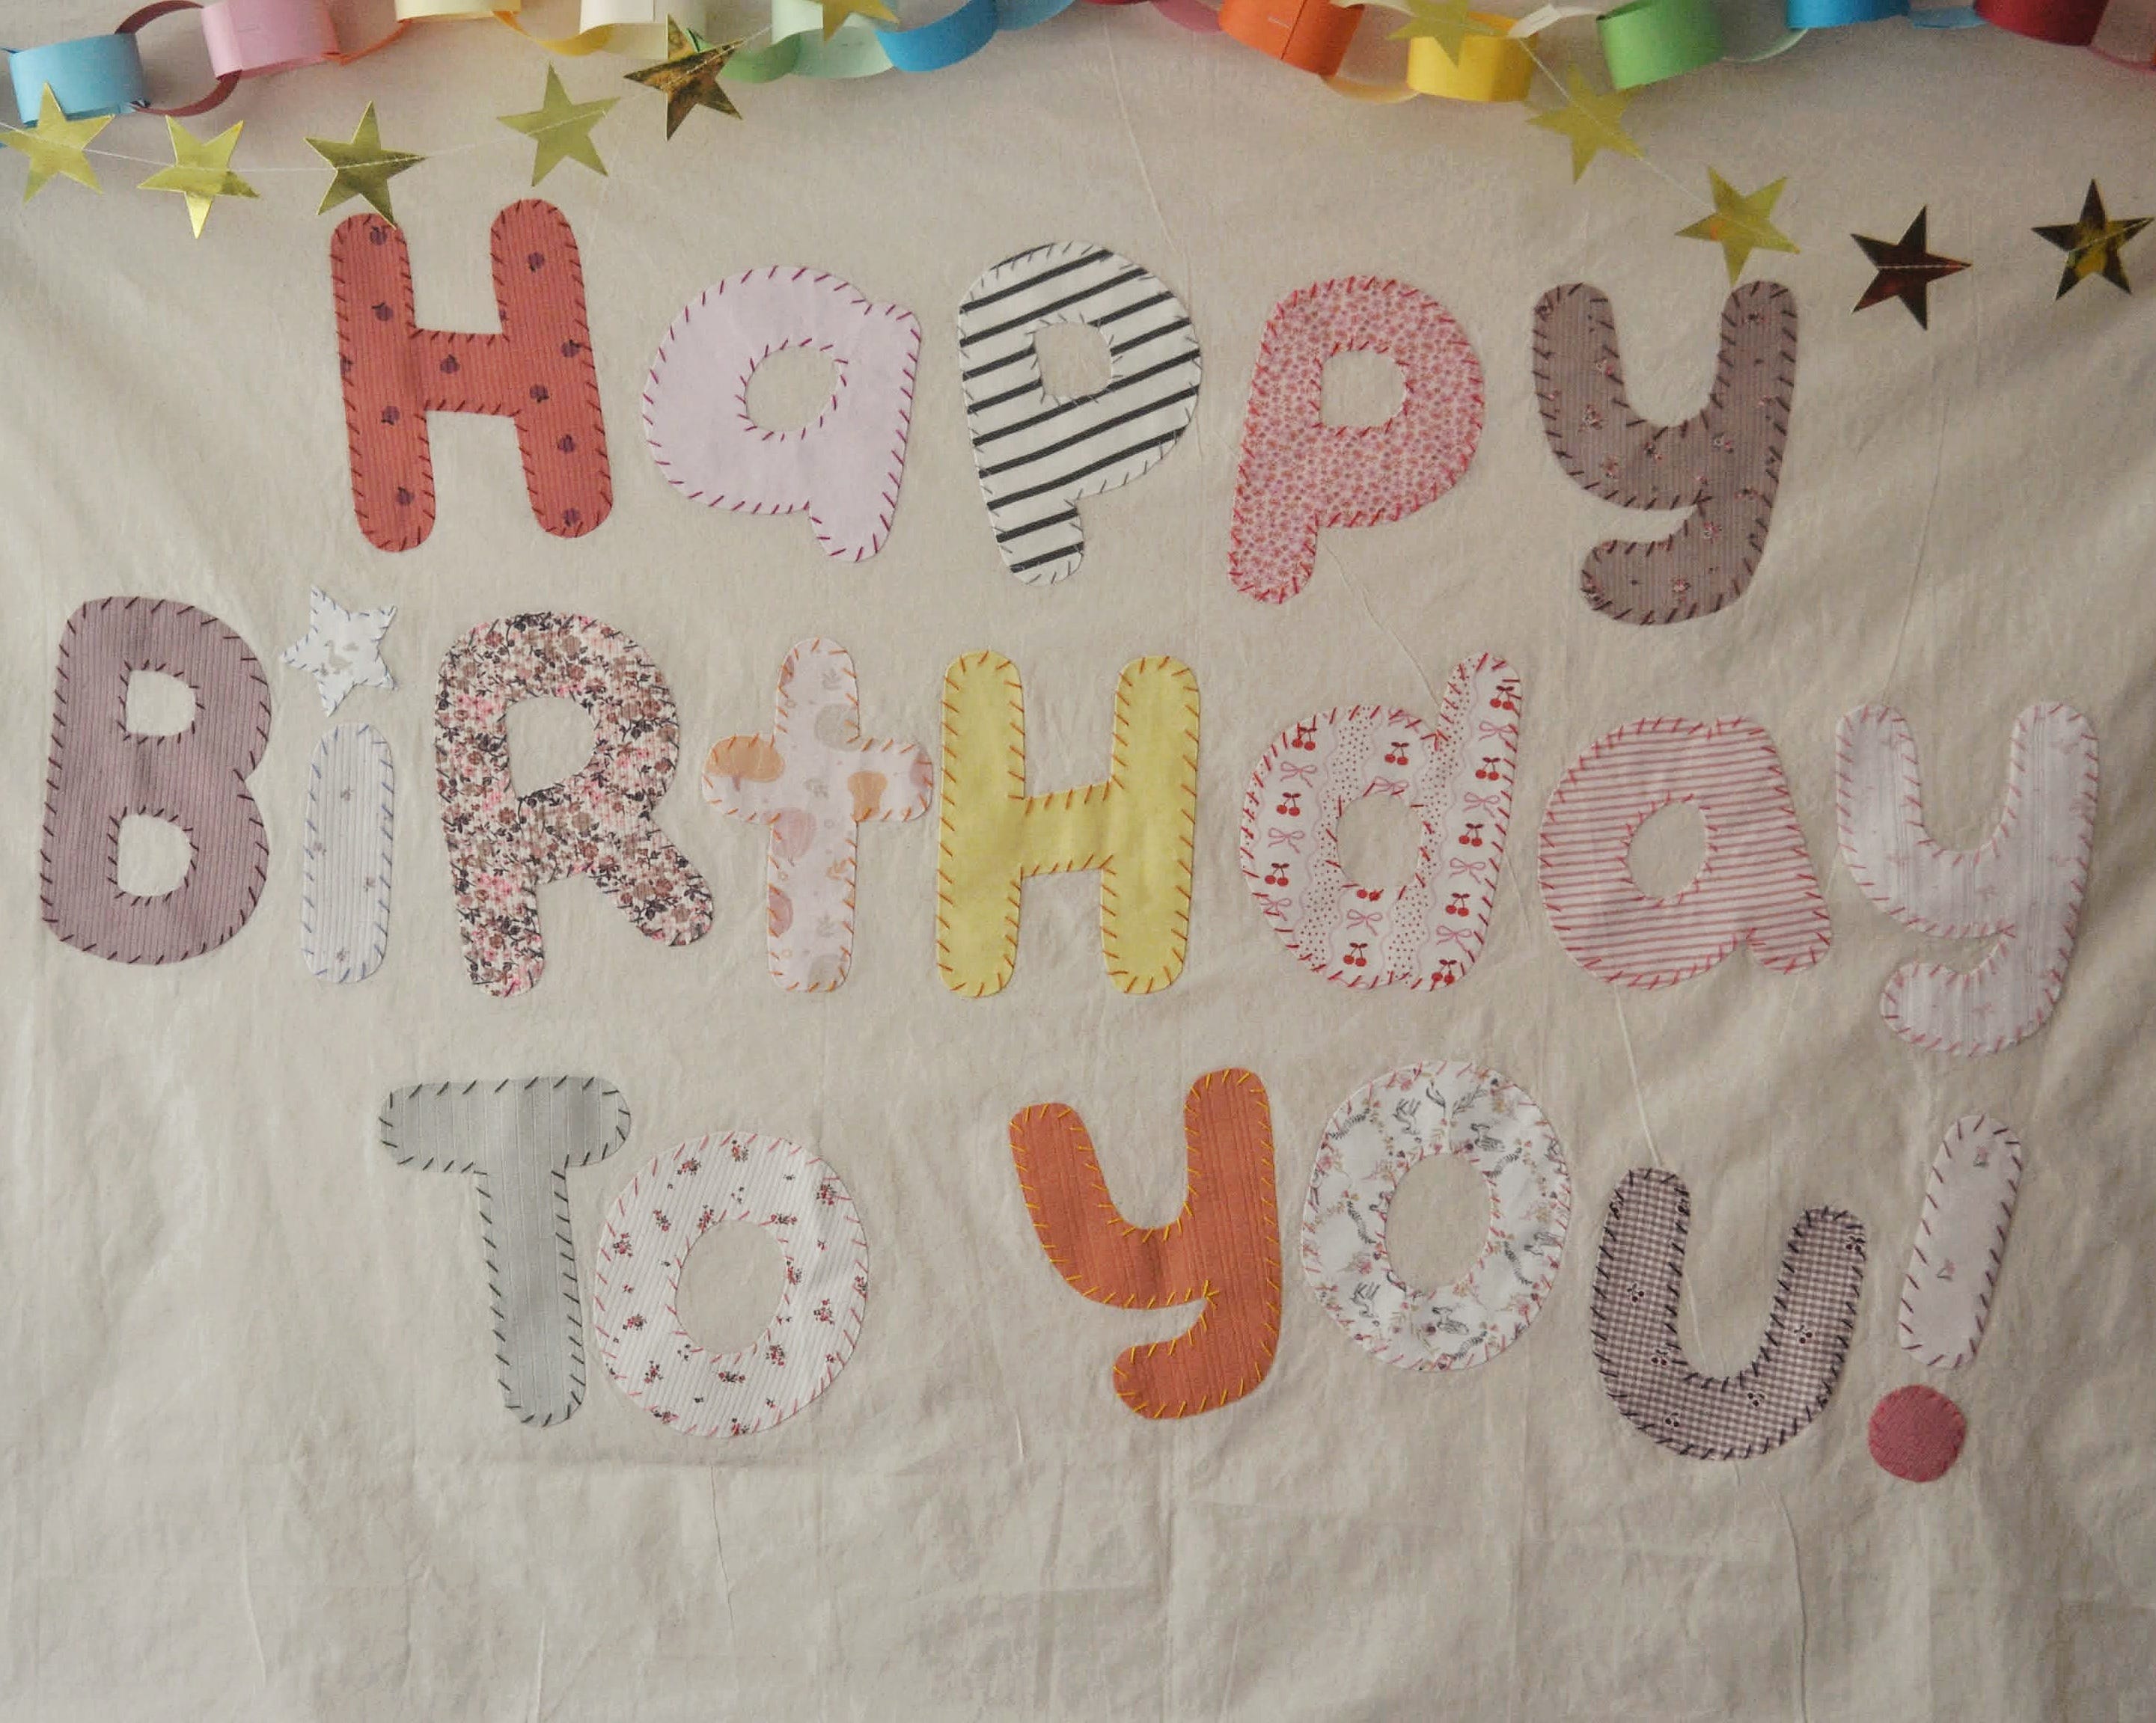
I think this was the DIY that finally broke the camels back in terms of how many crafts Husband could put up with. I noticed the first crack of impatience when I innocently asked if he thought the backdrop should say ‘happy birthday!’ or ‘happy birthday to you!’ — to which he replied: “what does it matter?” — and the second 3-days later when I asked him what he thought of my progress, which garnered me a “lord help me from answering any more questions about that quilt” 😂
This was definitely my biggest DIY undertaking for the party, and probably took the guts of 5-ish days to finish completely. I ordered a huge sheet of fabric online, cut a bunch of Bean’s old baby clothes into a mix of capital and lowercase letters, stuck them onto the fabric with iron-on glue, and then hand-sewed around the edges of the letters for a more secure hold. If I’d bought a stronger iron-on glue then I wouldn’t have needed to hand-sew around the letters — by far the most tedious and time consuming part! —, but I now think the little hand-sewn edges add a charming homemade quality? A nice silver lining to an accidental oversight!
As labour intensive as it was, I’m obsessed with the finished product! I can picture Bean wearing every single one of the outfits that got repurposed into a letter, and I love that this backdrop gave us a reason to hold onto them! I also love that we’ll get to hang this up for every future birthday to take photos in front of? For extra memory-making, the three of us also added our handprints to the corner and I couldn’t love it more! Imagine how sweet it’ll be as we add Bean’s growing pawprint every year!?
DETAILS:
// Canva, for doing a mock-up of layout + lettering. Font used: Handpicked Seashells
// 1-metre unbleached calico cotton fabric from Amazon, for the backdrop
// old baby clothes, for cutting into letters
// heat-n-bond lite iron-on adhesive from Amazon, for securing the fabric to the backdrop
// embroidery thread + needles, for sewing the letters onto the backdrop properly
// acrylic paint from Flying Tiger Copenhagen, for family handprints
paper chains


I’m sorry — but a child’s birthday party has to have paper chains and that’s just the way it is! I made six long chains to hang from the ceiling + decorate the party room, and I loooove how retro they made it feel! I’m not really into the chunky paper chain trend doing the rounds at the moment, so I cut my paper into 8 thin-ish strips, and my chains ended up being about 70-strips long. I used a mix of rainbow + pastel coloured paper and it came out so cute!
90s party décor, a fun burst of colour, and a therapeutic few hours spent mindlessly stapling — success!
DETAILS:
// rainbow coloured and pastel coloured card from Art & Hobby, for the chains
// many many staples, for securing the chains together
bakes and smash cake
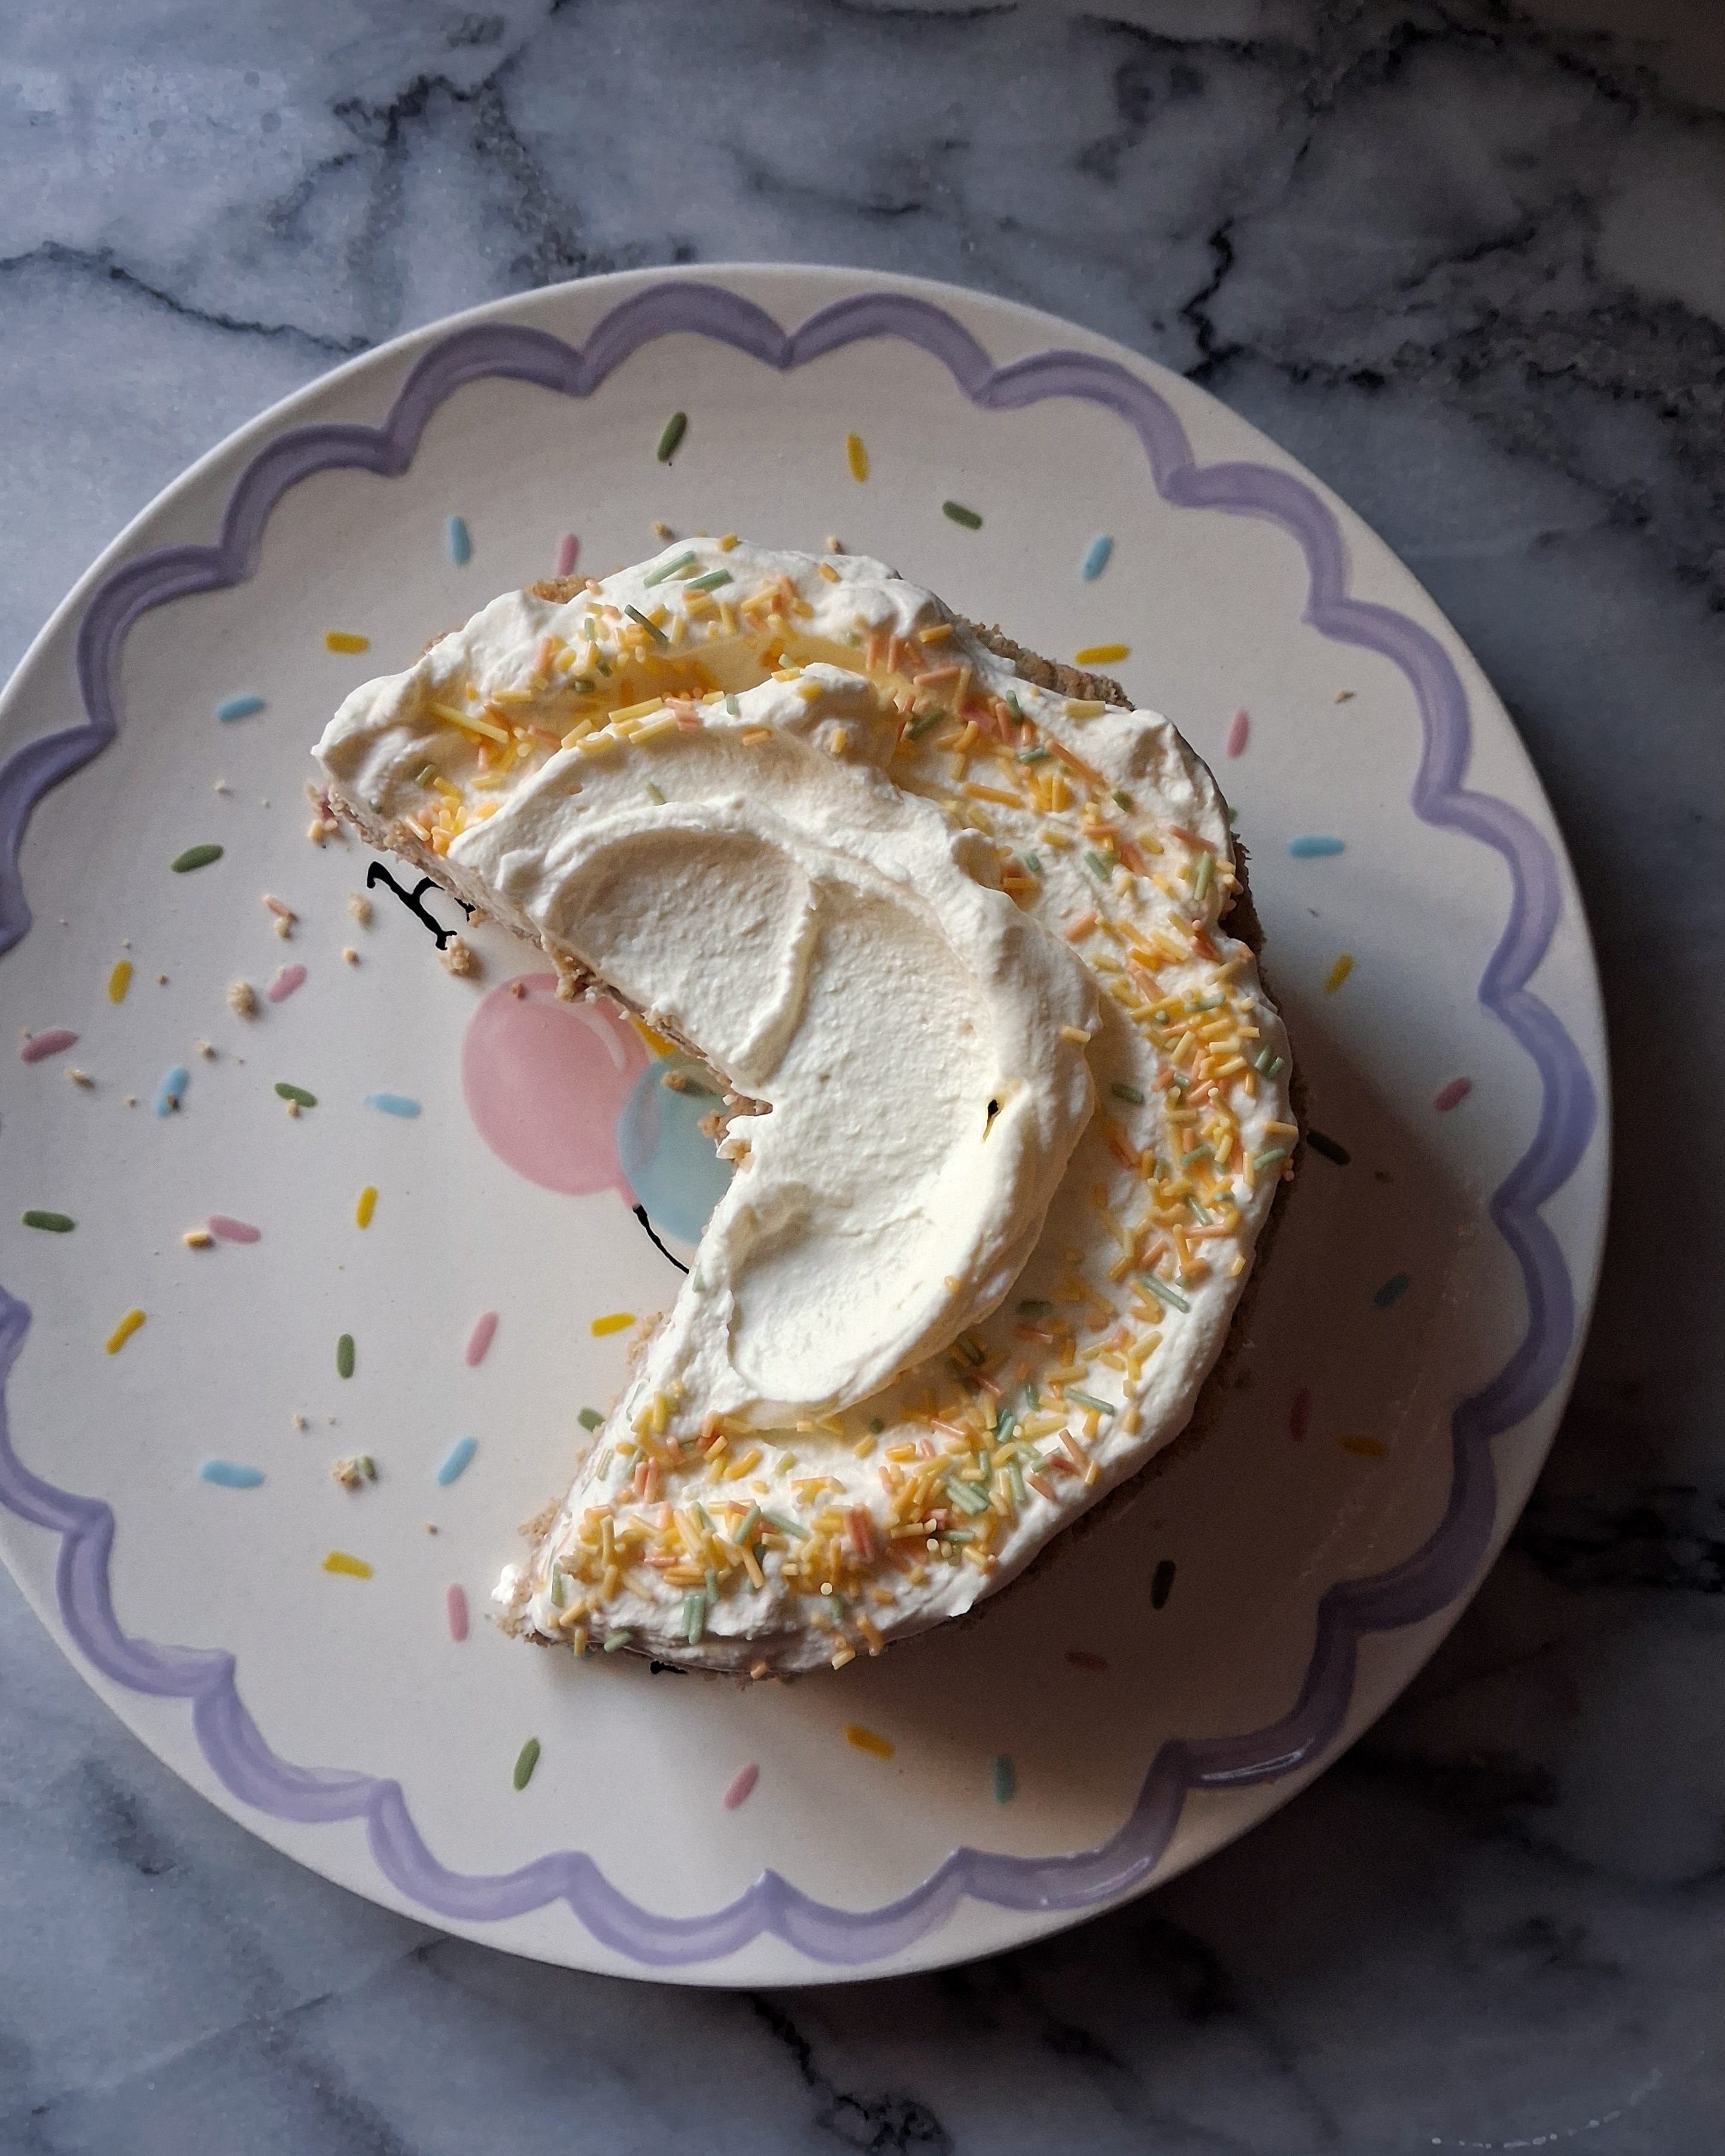
In an effort to keep things super simple, I decided to make two of the most reliable bakes I know: rice krispie squares, and honey butter apple cake. The former is the ultimate crowd pleaser, the recipe makes a huge tray of chocolatey goodness, and it actually gets made on the hob, so it was a quick easy thing to knock off my list. The latter is also a reliable crowd pleaser; I’d made it many times before, we had an abundance of apples from the tree in the back garden, and it simply isn’t a birthday party without an actual cake for guests.
Seeing as Bean still hasn’t had any real taste of sugar yet to speak of(!), we wanted to make her her own special cake to continue that trend. I settled on a recipe for a yogurt banana cake spiked with vanilla and cinnamon, and it ended up being not half bad! I used whipped cream as the defacto frosting, and ended up finishing it off with a light dusting of sprinkles across the top. Bean loved it!
Due to the aforementioned ER visit, Bean’s smash cake is the only bake I have photographic proof of. There wasn’t a single rice krispie crumb to be found when we got back from the hospital, and only a few slices of apple cake remaining — so I’d say people liked them! I would’ve murdered a rice krispie square after the day we’d had, but alas, it wasn’t meant to be.
DETAILS:
// Rice Krispie Squares from Avoca, via In an Irish Home
// Cinnamon Sugar Apple Cake from Pinch of Yum
// Baby Smash Cake from MJ and Hungryman
everything i did not DIY
extra décor bits


Husband thought it would be so cute to hang a balloon or two on the front gate to let everyone know where the party was and who was I to deny such a fun nostalgic idea? The fact that it was just our immediate family and closest friends coming was obviously irrelevant.
I gave into the Pinterest birthday board pressure and bought a couple of gold star garlands to dot around the place, and I love the sparkle they brought to the room! We hung them from the art on the walls, across the backdrop, and around the window to catch the light. If I hadn’t been absolutely maxxed out on the DIY front then I might’ve been tempted to make my own garland, but frankly it was nice to just buy something ready-made for once.
DETAILS:
// balloons + birthday candles from Dealz
// gold star garland from Amazon
party tableware, nibbles, and drinks
We decided to go for paper plates, napkins, and cups to make our lives easier. I found some adorable rainbow spotted plates/napkins, and the cutest little paper cups with birthday candles going around — but you’ll just have to take my word for it because I didn’t get to take a photo before we left. Sigh.
The same easy approach goes for the savoury food we served; we opted for little nibbly bits like cocktail sausages and tortilla chips with dips etc., things that people could just pick at while we mingled. Again, no photographic proof — but based on the fact that there was barely any food left when we got home, I’d say this menu was a success!
DETAILS:
// rainbow spot plates + napkins from Tesco
// candle themed paper cups from Dealz
// Bottlegreen presses, cocktail sausages, hummus, breadsticks/cheese straws + tortilla chips and dips from Tesco
bean’s birthday outfit
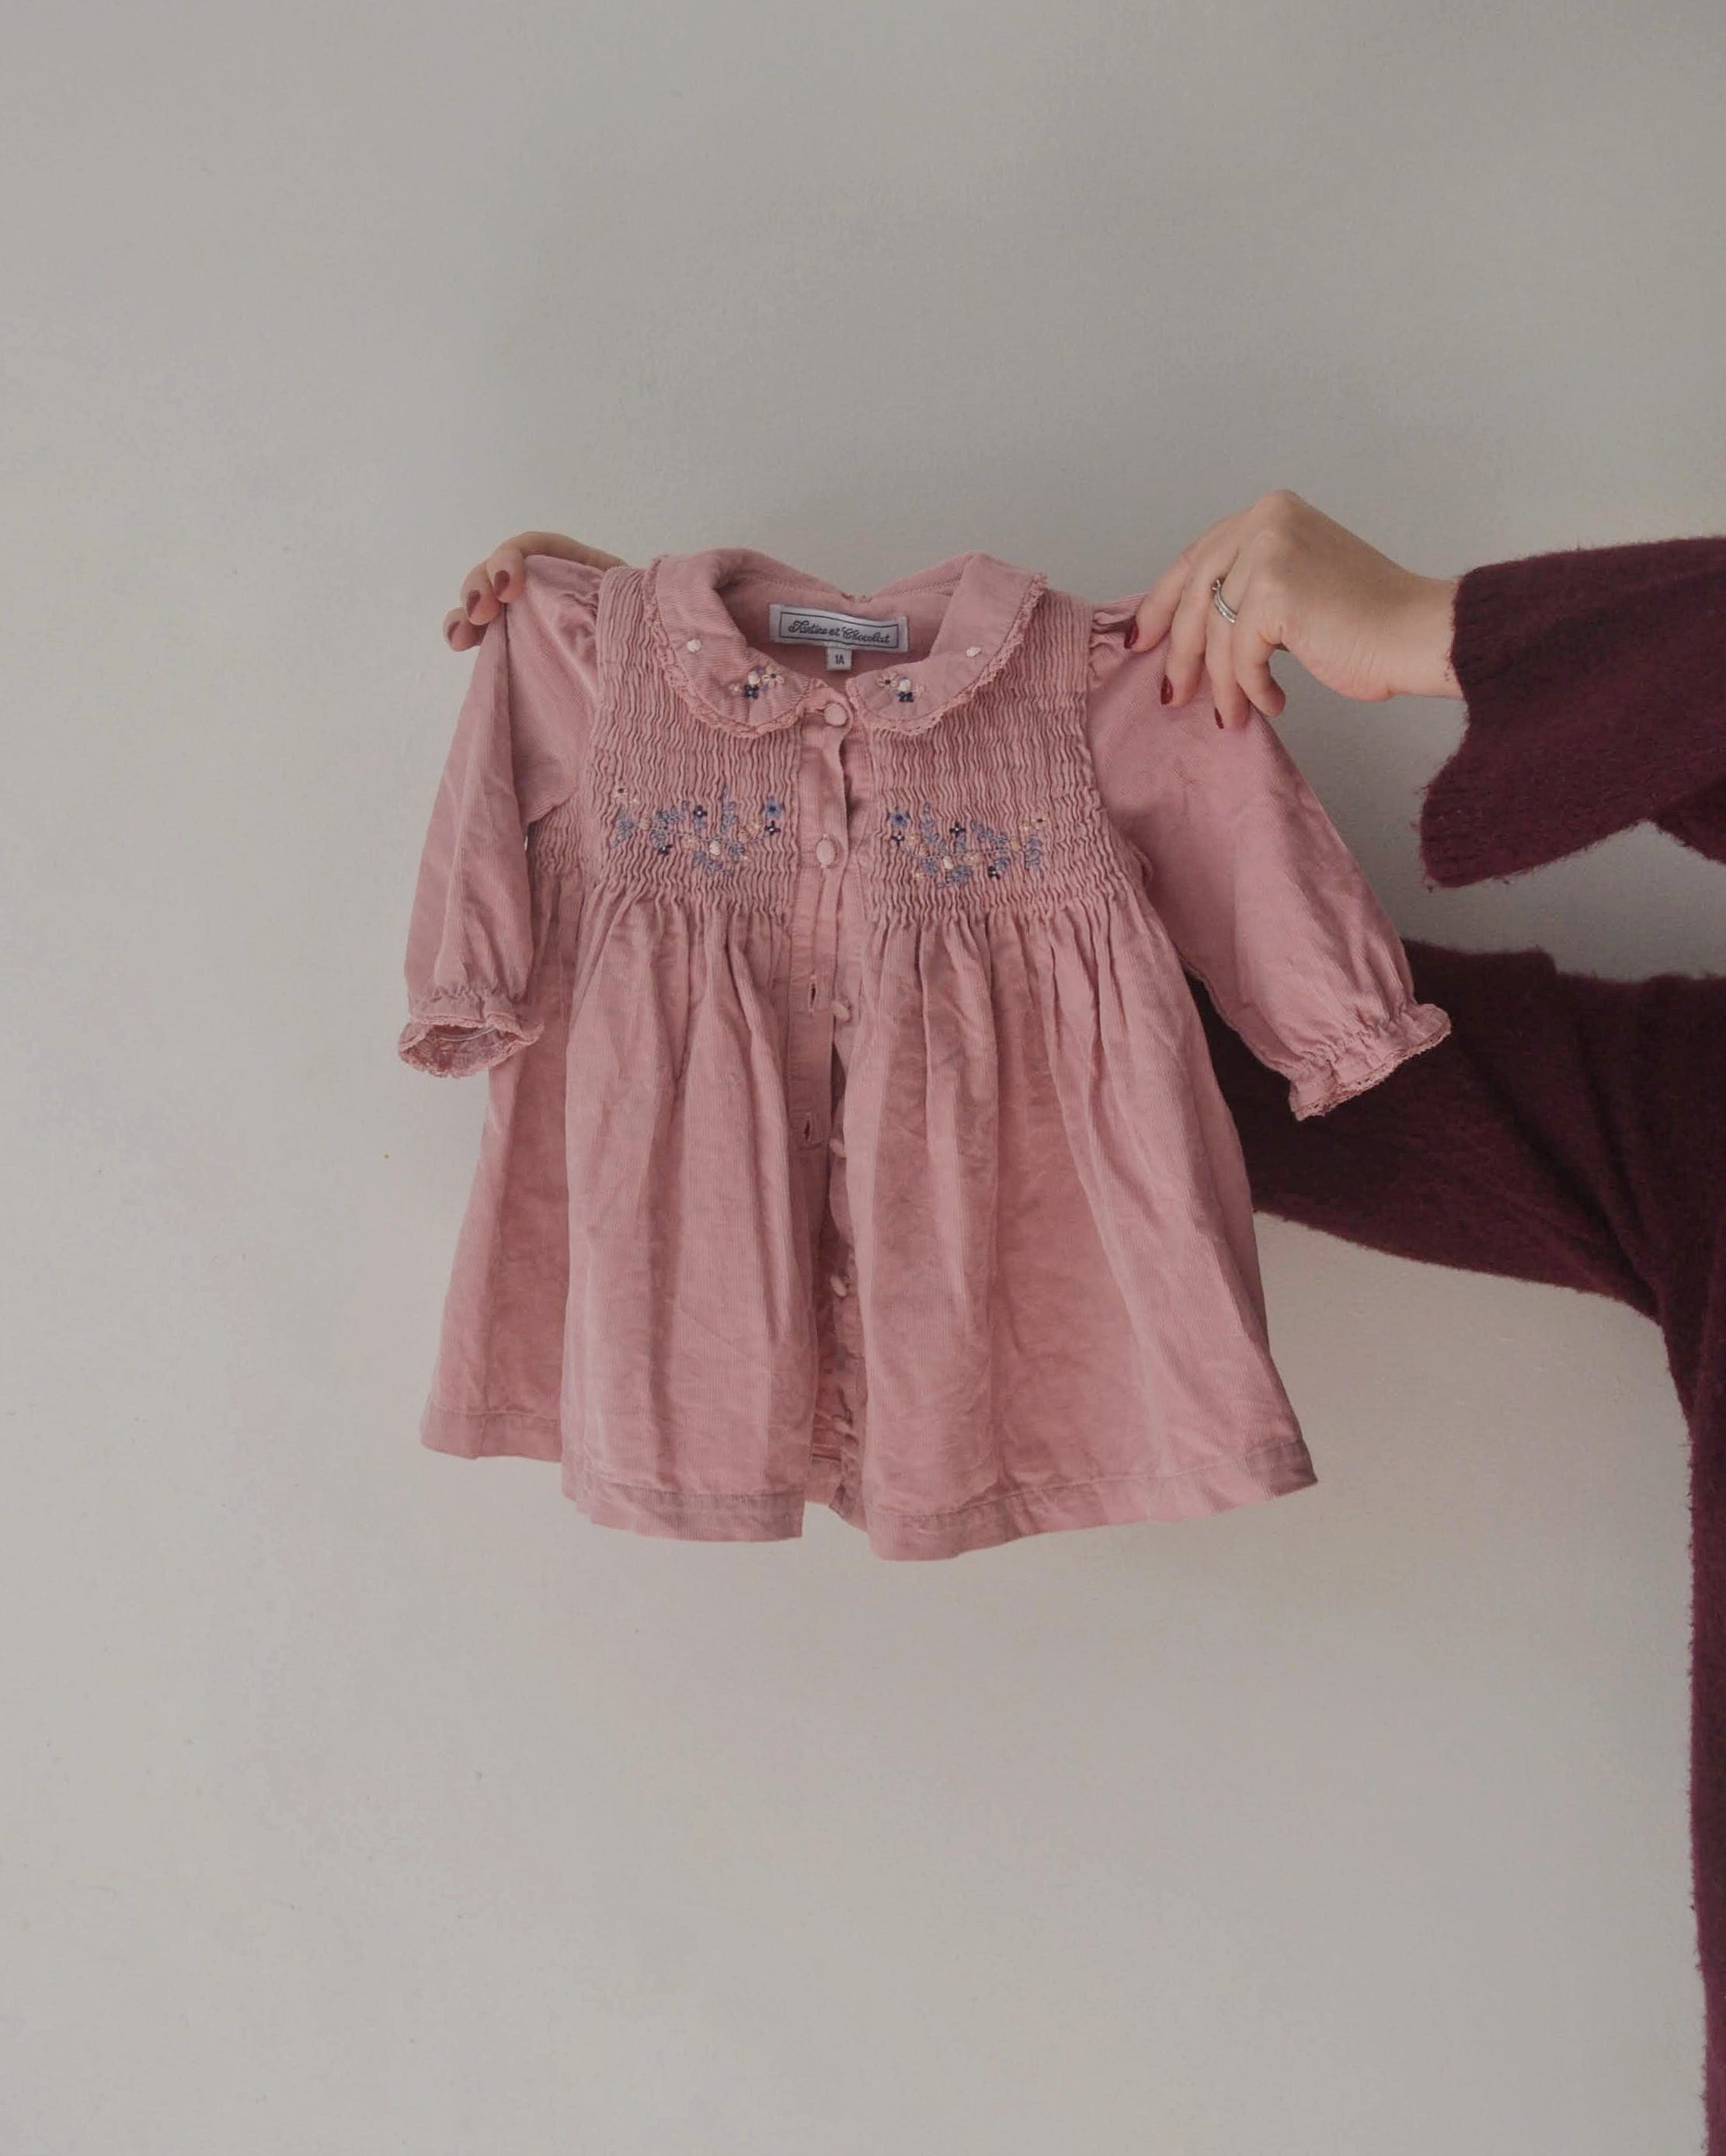
I might be crazy enough to have undertaken all these wacky crafts — but I am nowhere near delusional enough to think I could make Bean her own special birthday outfit. We purchased this gorgeous dusty pink smock dress with dainty hand-embroidered flowers and a cutesy peter pan collar back at the very beginning of the year, and I’m so glad it fit her perfectly just in time for her birthday! It effortlessly toed the line of fancy yet fun and has a beautiful timeless quality about it. I picked up a pair of baby tights with ruffles on the bum for her to wear underneath, and the finished outfit was so adorable!
DETAILS:
// Eglantine Smock from Tartine et Chocolat, via Over The Moon
// tights with ruffle bum from Dunnes Stores

And there we have it, every single detail from Bean’s first birthday party: it’s fun to be ONE! I’m so proud of all the crafts I DIY-ed for the big day, and I’m so happy to get to preserve the details of them all here on the blog forevermore. Which craft was your favourite? If you have any thoughts or questions, hit me up using the comment box below — I’d love to hear from you!
Happy crafting,
Vicki xo


related posts
The Best Thing I Ever Baked
Monthly Musings: October 2025
Monthly Musings: October 2026